|
by Bob Norson
I know the quote above well because it
is mine. It reflects one of the cruel lessons one learns from
painting on a steel boat. Another one is; “the first step
is the most critical one with each subsequent step decreasing
in importance. Both quotes being paradoxically true but the latter
doesn’t sound as sexy.
Lets start with a few things I know that
don’t work; “Paint right over Rust!” or “Kill
Rust”. You find these things in the local hardware store.
The clerk will swear by the stuff. Maybe for temporary coverage
of a garden mower but don’t waste your time on a boat...
Another? “Rust Converting Paint!” or just rust converter.
Not up to the job. Iron oxide, rust, is changed chemically when
exposed to an acid, becoming iron again. Rust converter is merely
a dilute acid and the paints incorporate some of the acid into
the mix. Maybe OK for detail work on your old car... I tried
one of the best of the breed, “Ironise” by “Gal-Mat”
and wound up re-doing all the area I applied it to. I did keep
it around for spot repair because it is so easy to apply, being
water based, and quickly re-coatable.
In short, a steel boat in a salt water
environment is the most severe test of a coating system. If you
can blast the steel with abrasives the solutions are far easier.
Go right to the best quality epoxy primer and carry on from there.
The green police are making it harder to find a place where you
can blast and places where you can are quite expensive due to
the regulations. So as a practical matter, knowing how to get
a reliable paint system repair on weathered steel is a necessity
for steel boat ownership.
“It’s
the Preparation Stupid!”
Being the proud owner of one of the ugliest
box trailers in existence, I found a suitable piece of weathered
steel to demonstrate on right in the back yard. (lucky me!) As
you can see by the photos, a nice deep scale rusted mess similar
to what you find on a neglected steely. The old fashioned hammer
and chisel is a good place to start (air powered chisel even
better) but be careful of deceit at every step. There is no way
a chisel will remove rust suitable for painting. The next step
for non-power assisted tools is the screw driver tip scraped
vigorously across the area. Better, but not half way there yet.
You can succeed in this fashion on small areas but it takes particular
attention to detail and way more muscle than you would imagine.
If you have magnification available, this is a good time to use
it. Every step up in magnification unfailingly reveals a bit
or more of scale that missed your attention without it. When
you THINK you have it conquered, go over the area firmly with
a steel brush and have another look. I bet you find more but
should you judge the effort worthy, you are ready to paint, insuring
your surface is dry as well as clean. A quick wipe with acetone
is a good idea.
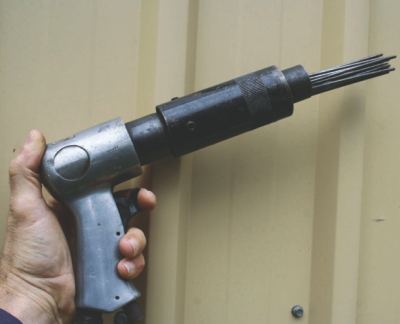
If you are in an area that will allow for
the noise of an air compressor of reasonable output (10 cfm minimum,
15 better) a scaler tool is more effective and much easier to
use.
DO NOT FORGET EAR AND EYE PROTECTION! Go
ahead.. ask me how I know but talk really loud, OK!
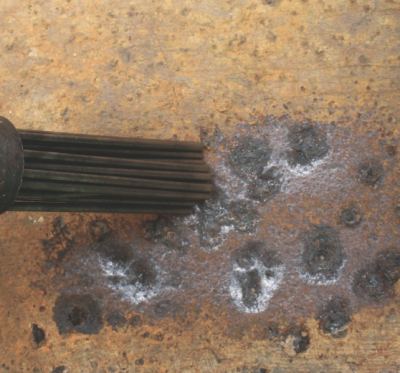
The makers of the tool generally recommend
about 40-60 lbs line pressure to run but I find they hardly work
at that pressure. I got away with 80+ but any more and the tool
doesn’t last long. The tool makers also recommend a daily
oiling of the tool. Be careful of this as any excess oil is blown
out the front of the tool. If you know or suspect this has happened,
carefully wipe your repair area with acetone or methylated spirits
to remove the oil contamination. This may be a good idea in any
case as the acetone will tend to remove moisture as well. But
I’m getting ahead of myself.
Psychologically it can be hard to persevere
because you don’t want to believe it is as bad as it is..
but don’t be fooled.
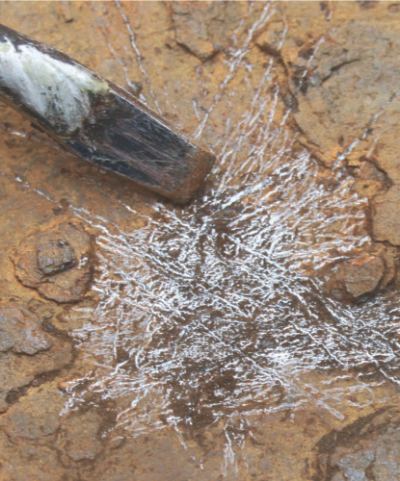
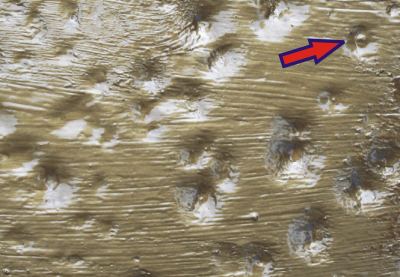
One of the hardest parts of this is to
train yourself to recognise the scale. In photos at bottom, is
a spot I missed. I did pick it up when I put the first coat of
paint on. I saw the small lump. It was when I put these photos
up on the screen that it became more noticeable. With my experience
I should have caught it sooner but it appears (sorry) I’m
RUSTY!
The lesson learned is you just can’t
over-do the preparation. No paint product will save you from
serious scaled rust. It will probably come back to haunt you.
If I am successful in getting this point alone across to you
it’s a win. So.. when you have done it to completion the
forth or fith time and finally no new tiny bit of scale explodes
in dust from the tool, it’s time to go over it with the
steel brush then a thorough clean and dry. Use acetone to wipe
down if you think it is possible the surface could still have
some oily contamination from the scaler tool... or just because.
It never hurts.
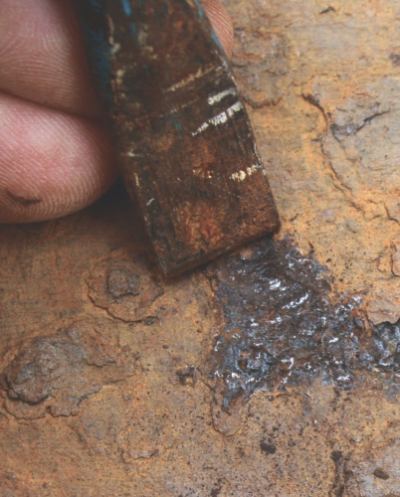
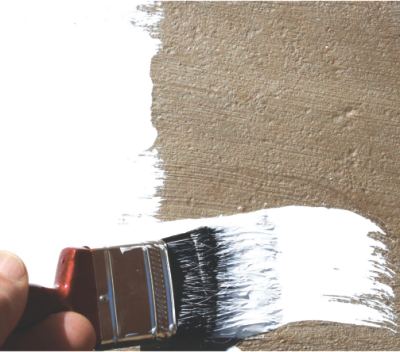
Apply your pre-prime paint. POR 15 is
the product being used in the photos but it is no longer on the
market in Australia and was found to be less than the best with
years to compare. Altex pre-prime 167 was the champ but Altex
no longer sells it. It appears International Paints has taken
it up and kept the number. Ask your International Paint dealer
for Pre Prime 167 or Devoe Pre Prime 167. It goes on piss thin
and encapsulates surface rust and even light scale rust. The
Pre Prime167 has a long dry time, 6 - 8 hours, but likes to be
recoated when it is slightly tacky to the touch so consider your
timing. Put on at least two coats.
TIME
YOUR JOB TO ACCOMODATE YOUR PAINT SYSTEM
Consider your local climate and season
but do try to recoat or overcoat your Pre Prime 167 before it
goes hard.
My preference for epoxy primer is Wattyl
PR250 because it is cheap and good, a rare combination. Another
bonus is that is has a long overcoat tolerance. Up to six months
if out of direct sunlight.
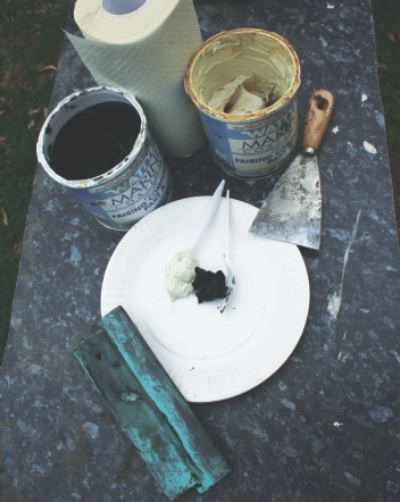
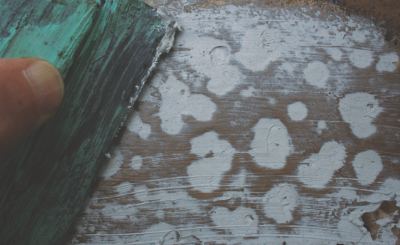
You may want to fair the repair. With the
first coat of epoxy primer in place it’s a good time to
do it. Wattyl Fairing Compound, shown at right, has been discontniued.
Use instead, epoxy resin with filler such as phenolic microballons.
It goes on smooth and resists air bubbles in the mix and it
sands so easy... as long as you don’t let it wait too long.
I tried the Jotun stuff as well but I found it harder to work
and prone to the bubbles.
For application the best tool I found
is a grout spreader for doing tile work. It’s hard rubber
blade and wide edge are perfect for the job, just filling the
low spots without piling it on everywhere. They are a $5 tool
most places.
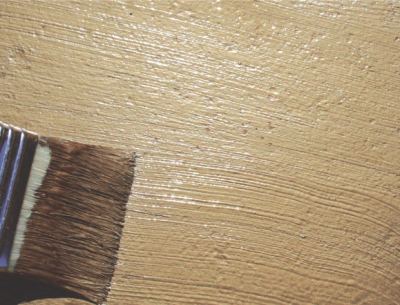
After the fairing put on your first coat
of epoxy undercoat There are many good high build epoxy undercoats.
Check local supply and compare costs but I’ve never gone
wrong with the Wattyl. At least two coats of undercoat over the
fairing. (As applied by brush) As far as top coat, I have over
12 years experience with Wattyl Poly-U-400 and it has been remarkably
tough and has the advantage of being easy to re-coat whilst other
types of polyurethane have to be sanded or chemically treated
to re-coat once cured. At least two coats of top coat as well.
That’s 7 coats minimum.
The
TDS
If clear instructions on preparation and
use, re-coating times etc, are not on the container then your
paint dealer may have the specs on file and will be able to supply
you with a copy of the Technical Data Sheet, TDS. Or search the
web. The TDS is usually spot on but some details can be fudged.
The TDS for Pre Prime 167, branded Devoe, says you must mix the
whole kit together but I have had no problem with using small
parcels of the paint and storing the sealed cans for reasonable
periods. They say you can recoat as long as 72 hours after going
hard but the best recoating is done when tacky so that is what
I advise. They also give looser qualifications for preparation
than specified in this article but... this information is intended
for users of steel boats operating in salt water. May your God
help you..... because perfection is only 90% effective.
And am I qualified to instruct on this
matter?
Well have a look here
and judge for yourself..
|