A new edition of The Coastal Passage has just been posted. Click on the image at right to download the PDF. Covid Cruising! From Tasmania to Greece with a boat built by the editor. For more information on this boat, see www.buildacat.com and check out The BareBones project.

 All photos and text in this article are copyright and property of The Coastal Passage. Reproduction or publication without permission is prohibited. This information is offered for private use only and remains the property of The Coastal Passage.

 The Original NORSON SPLICE. Designed by the author to be the simplist to learn and perhaps as strong as it can be done.

 "PRO SPLICE" This splice was discovered by "reverse engineering" when the author cut apart a splice done by a professional rigger in the UK. It's simple and easy.
 The new NORSON DOUBLE SPLICE is designed to satisfy the most sceptical rigger and sailor. A little more complicated but with double the graphics to learn from, should be do-able even for the novice.

 How Strong is this Splice?? Click here to see the test...

THE NORSON SPLICE

Eye splicing double braid is one of those mysteries of the sea that clog up the schedules of riggers and cost sailors money and time to get done. I hate the idea of being dependent on anybody for any boat maintenance or repair. Besides the fact not all trades people are honest and competent, what if you are somewhere they aren't? So... Several years ago I determined that I just wasn't going to waste days of time in running gear around to the pros nor pay the price so I sat down in my cockpit and worked it out.

I am a real visual type so I have arranged this to suit myself. Follow the numbered photos and the commentary beside the photos to fill in what ever isn't obvious.

(1)Before preceding, tie a knot as illustrated (about 1.5 metre from the end), then get hold of the core and pull it out the end of the cover for about 2 to 3 inches. (50 to 75mm) Wrap some PVC tape tightly around the joint and cut. This leaves you some extra cover material that will make life easier when doing the last step and the knot will keep the slack close to your work.
 (2) Set up where your 'eye' is going to be and how much core is to be woven inside. Note; some of these photos are from an earlier version and do not have the tape in place on the end.
(3)Use a small fid to poke through the cover. The idea is to part the fabric gently and get the tool under and behind the core until...
(4) you can get behind the core enough to pull the core out the side of the cover. Be careful not to get a strand of the cover by mistake when extracting the core.

(5)This is about what it should look like.


(6)Now that you have the core pulled out, cut off the cover end.  
(7)What I have done here is to sew right through the cover and core with a heavy thread. Your sail repair supplies should have a needle and thread to suit. This prevents the cover from coming loose in the event your eye splice gets flogged about or not buried in deep enough to hold it with tension. Once sewn, cover it all with tape as in photo below.
(8)Secure the cover with a snug piece of tape to the core and also do the end of the core, be tidy and taper the end if you can. I used common PVC tape. My tool in this photo is indicating where the joint is going.
(9)At the joint selected, get behind the core again.
(10)Pull a length of core out of the length of the rope. It comes out easily. Note the ‘fat’ look of the cover on the long part of the rope as compared to the loop. Keep the loop snug. Don’t pull core from the loop.
(11)Using your fid to part the fabric in the core, then pull the tail piece through as shown.
(12)Repeat the process of weaving back and forth through the core all the way to the end of the tail.
(13)Pull the tail taunt within the main core and remove the tape on the tail and put a fresh piece over the end and creating a smooth join with the main core.
(14)Make the other end fast to something sturdy and start to pull the cover toward you.. milking.
(15)And it starts sucking the whole lot back inside the cover.
(16)Like milking a very stiff tit! Especially that last bit as is shown below
(17) Fighting for the last bit. Getting the core to dive deep into the joint. If it gets too hard... cheat! see below.


(18)This last step was always bitchy. The core can bunch up right at the end and rather than fight it, a little screw driver can be used to poke under the cover in the loop and pry it up using the bunched up core as a fulcrum. Do this gently, all around and then milk again.

(19) Then check the fit and do a little more with the tool if required but if it is a little lumpy and still resisting you...

(20) A hammer (gently) on a concrete floor does a great job of getting rid of the lumps and high spots. It compacts the core. Then one last milk..

Please scroll down the page for a tip from Gary Bell of Portland Oregon that you may prefer to the hammer method shown here. Also some other general tips. Thanks for contributing Gary! Good on you..

(22)Very satisfying! Now untie the knot you put in step 1 and give the loop a hard strain (the harder the better!) to test and set. Now go have a beer.. you earned it!

 So.. what happens when you put the Norson Splice on one side of a test line and the Norson double on the other, then drop the clutch on the four wheel drive?? Click above and see....

 My comments are in italics below

Bob:

Thanks for that great eye splice demonstration. I found several ideas
to add to my toolbox of splicing techniques. I have a couple of others
I would like to share with you. I stole these ideas fair and square
from several others, so there is no shame in stealing them from me if
you like.

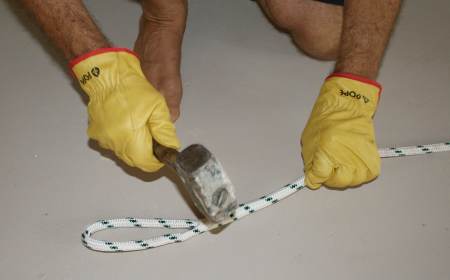
Instead of hammering on your splice, with the attendant risk of damaging
some of the fibers and ending with an uneven distribution of materials
inside the doubled section, lay the nearly finished splice on a clean
floor and using your shoe sole roll the entire doubled portion back and
forth repeatedly. This gentler pressure and repeated rolling 'works'
the uneven portions into place, whereas the hammer approach crushes the
lumps without redistributing them laterally inside the outer sheath.
This technique works fine for layed line splices as well as braid.

I did say use the hammer gently and I got a letter from a dutch sailor that said the hammer was actually traditional, but if you have good results rolling with the shoe, go with what works for you but I do not think use of the hammer as described is harmful to the ropes fibers.

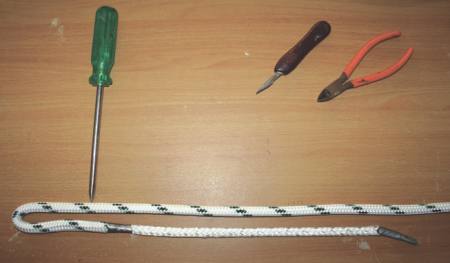
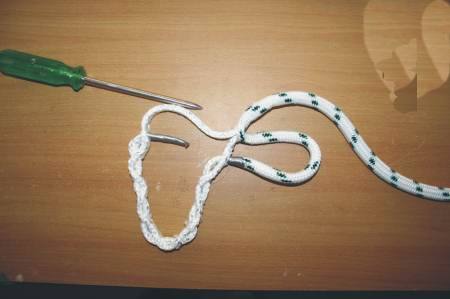
Another trick to make feeding ends easier and the finished splice
smoother is to cut core ends on as long a taper as you can. Wrap the
section to be cut first with masking tape, use a razor blade to make as
long a tapered cut as possible and immediately retape the resulting
tapered tip (or try the paraffin wax trick below).

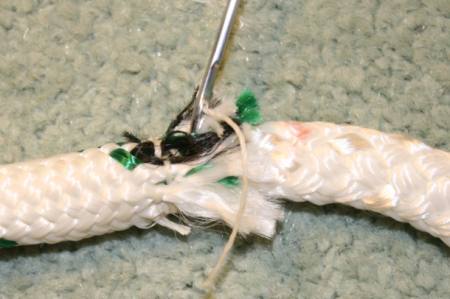
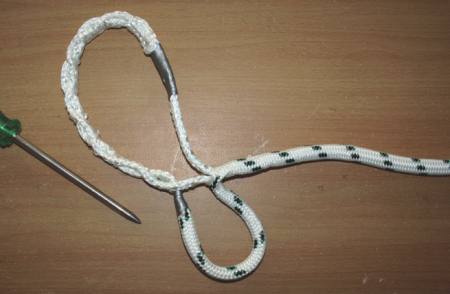
Instead of taping the core end to the outside of the original core (???) it
can be untaped and carefully worked into the interior and held in place
with a couple of Sews Awl stitches across the point where it last
entered the original core in place of the PVC tape that would end up
buried at the bitter end of your splice. That, by the way is where your
test splice broke, when the seizing/whipping tape that remained inside
the sheath was not compressing as the line stretched, but instead the
edge of that blunt end chafed the outer sheath fibers, initiating the
failure.

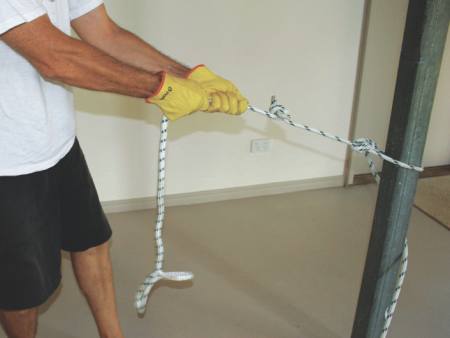
The splice did not break. The break was clear of the work and I really doubt the tape used had anything to do with the break. I think it was caused entirely by a few tons of steel in opposition to each other. There was a change in mass at that point and when the whole unit is challenged to the point of breaking, that is a likely spot.

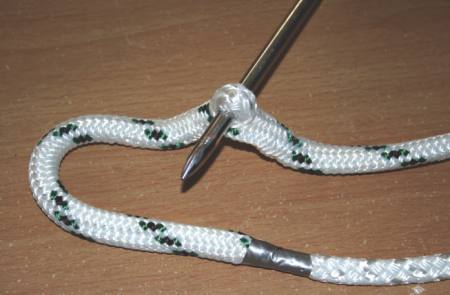
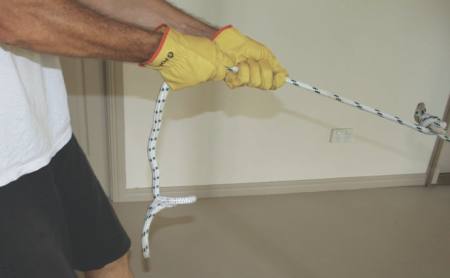
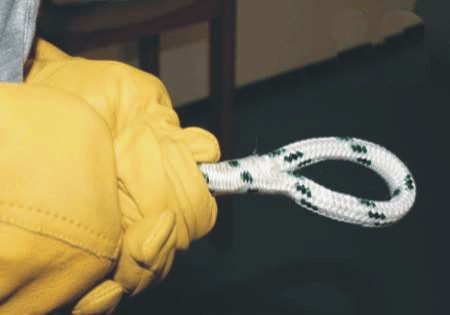
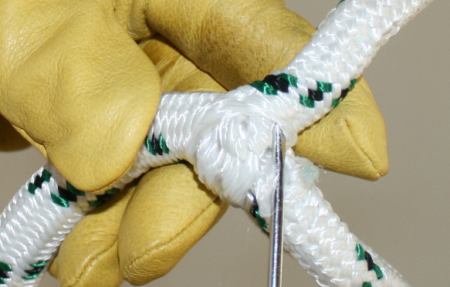
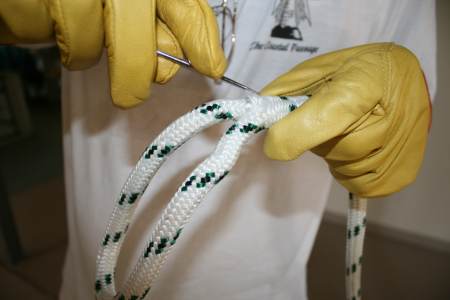
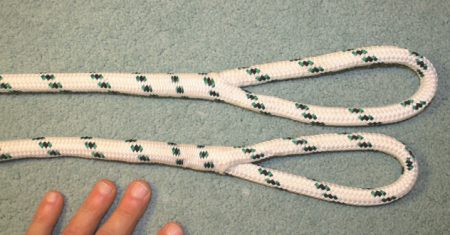
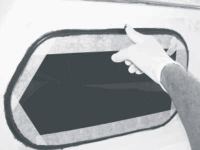
The spliced eye should always be made large enough that the "Y" part
(the throat) is not splayed apart much when under strain. I often seize
that area with waxed Sews Awl twine, secured at each of the three ends
with several decorative back stitches.

Define "much" but in genral I agree. I would express it as "too much". And all the seizing work you describe shouldn't be required if the splice is done correctly.

I have a big splicing project at hand making all new fancy custom
mooring lines for my big boat, and I intend to experiment with using
melted canning paraffin wax in place of tape to make the temporary
whippings. The melted wax can soak into the interior of the braid (or
layed) line and bind all the fibers in place when it solidifies. The
resultant wax/fiber is soft enough to be cut with a razor blade or sharp
knife, can be molded to tapered/pointed shapes by hand and is slippery
enough when cold (and wet) to pass easily through outer braid, for
instance. When the splice is finished the wax can be removed from the
interior with hot water,
good luck with that! and any remaining will soften when the splice
heats under load, lubricating the interior,
which might not work to advantage, preventing 'internal chafing.' Of course I don't expect anybody to play with a pot of melted
wax in their sailboat cockpit, but at my workbench it should work just
fine.

Your thoughts?

My thoughts? I think thank you very much for adding to the knowledge pool! This page is proof there are numerous ways to skin a kitty and some methods will work better for some so all are valid. Find what is best for YOU!

Gary Bell
34' power catamaran "Stray Cat" and
80' sidewheel paddleboat "Liberty Belle"
berthed in Multnomah Channel near Portland, Oregon

SUPPORT TCP!!!
Since 2004 The Coastal Passage has been providing usefull technical articles.
You have received all this for FREE and now we ask you to help us keep this going and growing.
You can help us by sponsoring TCP for as little as a glass of beer or wine.
CLICK HERE - its easy!

copyright the coastal passage 2018

  Back to Home Page 

   Technical articles

 FREE subscription

 Computer and digi photo tips, how to size, send and protect

 "How to make a website for novices" with only MS Word

  FREE download of the latest edition of The Coastal Passage.

 The Best in Technical Articles!

How to install plastic windows that don't leak and look professional

How to maintain and adjust your rig

 AIS what it is and how it works to make your passage safer
 
.

.

.


.

.


.

.

.

.

.

.

.

.

.

.

.

.

.


.

.

.

.

.

.


.

.


.

.


.

.

.

.

.

.

.

.

.

.

.

.

.

.

..

.

.

.

.

.

.

.

.

.

.

.

.

.

.

.

.

.

.

.

.

.

.

.

.

.

.

.

.

.

.

.

.

.

.

.

.

.

.

.

.

.

.

.

.

.

.

.

.

.

.

.

..

.

.

.

.

.

.

.

.

.

.

.

.

.

.

.

.

.

.

.

.

.

.

.

.


.

.

.

.

.

.


.

.

.

.

.


.

.

.

.

.

.

.

.

.

.

.

.

.

.

.

.

.

.

.

.

.

.

.

.


.